
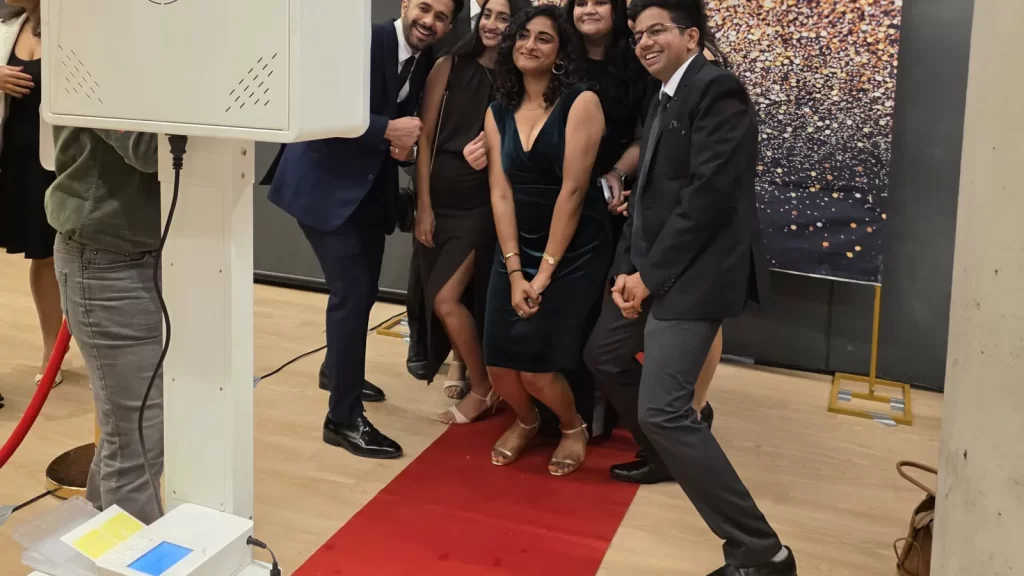
A trade show photo booth needs to fit inside the exhibitor’s approved space, give visitors a clear reason to stop and leave room for the conversations the stand exists to host. Start with the stand plan and show rules before choosing equipment. Just Great Events’ corporate photo booth service can be discussed within that plan; this guide focuses on the exhibition-floor decisions.
A trade show differs from a private reception because visitors are moving between many competing activities. They may be carrying bags, watching the time or trying to reach a particular supplier. An unclear queue or a long explanation can create friction. A concise activity with a recognizable output is easier to approach, and a separate conversation area lets interested visitors speak to your team without blocking the next session.
Read the exhibitor manual before sketching the activation
The organizer’s current exhibitor instructions determine the available space, installation rules and access arrangements. Review the stand dimensions, height restrictions, aisle boundaries, electrical ordering and move-in schedule. Do not assume that equipment which works at a banquet hall can be installed unchanged on a show floor. Give the booth supplier the relevant instructions and ask it to confirm the proposed configuration.
Identify who is responsible for services supplied by the venue or show contractor. Power, connectivity, material handling and access badges may be managed separately from the booth rental. Record those responsibilities in your production plan so an item is not assumed to be included by both parties. The written quote should describe the booth service, while your exhibitor checklist covers organizer-controlled requirements.
Use the final assigned stand location. A corner stand, an inline stand and a space near a busy entrance create different approach routes. An early floor plan can change, so confirm the version before artwork and physical scenery are finalized. If the show moves your space, revisit the queue, sightlines and loading plan rather than merely changing the stand number on the sign.
Draw the visitor route inside your boundary
Mark five functions on the plan: an invitation to participate, a waiting position, the capture area, output collection and a conversation area. They do not necessarily require five separate pieces of furniture, but they need a logical sequence. People should be able to finish the photo experience and step aside without walking through the next group or entering a neighbouring stand.
The camera’s operating footprint is only one part of the requirement. Include a backdrop’s supports, the attendant’s position, any printer or sharing screen and a place for visitor bags that does not obstruct movement. For a 360 format, show the full camera boundary. Do not plan to borrow aisle space for a queue unless the organizer explicitly approves that arrangement.
| Stand function | Useful position | Conflict to avoid |
|---|---|---|
| Invitation | Visible from the visitor approach | A sign that hides the stand’s main identity |
| Preparation | Inside the stand before capture | Waiting visitors blocking the aisle |
| Capture | Within the confirmed equipment area | Movement entering a neighbouring display |
| Collection | Beyond the capture exit | Guests staying in the camera position to use a phone |
| Conversation | Beside the exit with room to pause | A sales discussion stopping the queue |
Test the layout with people standing in it, not just with rectangles on a diagram. Include someone holding a tote bag and someone waiting with a colleague. If the layout works only when everybody stands exactly on a marked point, it may be too tight for the show. Simplify the setup or select another format before committing to production.
Choose an output visitors can understand quickly
A print offers an immediate physical keepsake; a digital portrait avoids carrying another object; a short video creates a different participation experience. Choose based on the audience and available space. The largest or most animated equipment is not automatically the strongest fit for a small stand. It may attract attention while leaving too little room to explain the product.
Show a sample of the finished output so visitors can decide whether they want it. A short sign such as an invitation to create an event portrait can be clearer than a technical description of the equipment. Keep any prop or theme relevant to your brand. If the picture has no connection to the exhibitor after it leaves the stand, the activity may feel detached from the rest of the display.
For output comparisons, read the company event photo ideas guide. For this setting, narrow the choice further by asking how quickly a visitor can understand the activity, participate comfortably and move to the next stage. The right format serves both the visitor and the stand team.
Keep the interaction short without rushing guests
Look for unnecessary steps before asking the attendant to work faster. A large prop selection, several theme choices, an extended form and a lengthy approval screen can all add time. Choose a focused experience that preserves the part visitors value. A small number of clear choices is easier to explain than a menu designed for a long private party.
Use a realistic planning example to test the sequence. If a visitor needs time to choose a prop, understand the session, capture the image and collect the result, account for each stage. The total is not just the camera countdown. Ask the supplier to assess the proposed process, then test it with the final artwork and instructions before the show opens.
Build a way to handle temporary peaks. A team member can explain the activity while people wait, but should not make promises about an exact wait that the attendant cannot maintain. If demand grows beyond the available area, follow the organizer’s rules and pause invitations if necessary. Keeping the aisle clear takes priority over adding another person to the line.
Let the image carry a readable brand identity
Use the current approved logo and a concise event or campaign identifier. Leave enough space for the person in the image. The stand already contains product messaging, so the photograph does not need to reproduce every line from the display. A recognizable, readable design is more useful than a miniature brochure around the edge of the picture.
Check the output at actual print size or on a phone. Small legal text, several partner logos and a long URL can become unreadable. If a link or code belongs on the output, test it from the finished sample and confirm that the destination is relevant to the activity. The design and destination should be approved together rather than treated as unrelated tasks.
The backdrop and template checklist covers contrast, crop and proofing. For a trade show, also view the stand from the aisle to check that the backdrop does not hide the exhibitor name or product demonstration. The booth is part of the stand, not a separate room with its own competing identity.
Make the sales handoff a choice
Some visitors will want the photograph but have no immediate product question. Others may be genuinely interested in speaking with your team. Let the photo experience lead naturally to an optional conversation. A staff member near the exit can offer help without forcing everyone through a sales pitch before they receive their output.
Separate the destination used to deliver a photograph from a request for later marketing or product information. Have your organization’s responsible team approve any form and guest explanation. Ask only for information needed for a clear purpose. A photo delivery address by itself should not be reported as proof that the visitor requested a sales follow-up.
Brief the stand staff on the distinction between participation and interest. A useful handoff might record that a visitor asked about a particular service or requested a demonstration. It should not infer buying intent from a smile in a photograph. This gives the sales team better context and keeps the experience respectful for visitors who simply wanted the keepsake.
Prepare the team for the actual floor conditions
Show floors can be noisy, and staff may not hear a long explanation. Agree on short, consistent phrases for inviting visitors, explaining the output and directing them to collection. The attendant should know who handles a product question; the exhibitor team should know when to leave the capture area clear. Rehearse the handoff with the people who will actually staff the stand.
Confirm badges, access times, unloading arrangements and the contact for an organizer question. At a Toronto venue, the route from the loading point to the stand may involve procedures that differ from normal guest entry. Use the current show instructions rather than relying on an assumption from a previous event in the same building.
Also test the delivery connection. Ask what happens if venue internet is weak or unavailable and how visitors will receive their files in that case. Keep the plan understandable to staff. Do not advertise an immediate delivery method that has not been tested in the configured setup.
Review the results using separate measures
Record completed sessions, any observable output delivery issues and the number of explicit follow-up requests your team received. These describe different things. A group session may include several people, and one person may return more than once. Do not equate a session total with unique visitors, qualified leads or public impressions.
Note where people hesitated, whether the queue stayed inside the approved area and whether the staff could hold useful conversations. Those observations can improve the next stand plan. If the team wants to measure sales outcomes, use its normal verified sales records and distinguish that later analysis from the booth’s activity count.
Plan the end-of-day handover
At a multi-day exhibition, confirm what stays in place overnight, who can access the stand and when the next day’s checks happen. Follow the organizer’s security and access instructions rather than assuming the hall is available after closing. Keep the current artwork and guest instructions together so a staff change does not alter the experience. Before the final move-out, identify who collects any exhibitor-owned props, printed material and approved event records.
Send a complete exhibition brief
Provide the show name and date, assigned stand dimensions, current floor plan, operating hours, preferred output, artwork requirements and exhibitor rules. Identify the organizer contact and the person approving the design. Include any separate services your team is ordering so the booth supplier can review the whole setup.
If your event is primarily scheduled talks with breaks rather than an exhibition stand, use the conference photo booth planning guide. For a trade show, request a written quote around the approved stand plan. A clear route, readable identity and optional conversation make the activation easier for visitors to use and easier for your team to operate.